Removing tile floors can be a challenging task, but with the right tools, equipment, and approach, it can be accomplished with ease. This guide will provide step-by-step instructions and a comprehensive approach to removing tile floors from start to finish.

How to Remove Tile Floor: A Step-by-Step Guide
When it comes to removing tile floors, it's important to have the right tools and approach for the job. Here's a step-by-step guide to removing tile floor:
● Gather the Necessary Tools and Materials
● Prepare the Room for Tile Removal
● Removing the Tile
● Removing the Underlayment
● Cleaning Up
● Installing New Flooring
Gather the Necessary Tools and Materials
Before attempting to remove a tile floor, it is important to gather all of the necessary tools and materials. Here is a list of the tools you will need:
- Safety glasses
- Dust mask
- Long-sleeve shirt
- Gloves
- Safety gear
- Shovel
- Masonry chisel
- Cold chisel
- Floor scraper
- Long-handled floor scraper
- Putty knife
- Utility knife
- Sledgehammer
- Rotary hammer
- Angle grinder
- Electric tile stripper
- Shop vac
- Plastic wraps
In addition to the tools, you will also need the following materials for the job:
- Plywood underlayment
- Type of underlayment needed if original is damaged
- Plastic sheets to protect the surrounding area from debris
- Thin-set mortar to fix any uneven subfloor caused during tile removal
- Shop vacuum to clean up any debris
Wearing the right safety gear is vital to protecting yourself when removing tiles. Be sure to wear safety glasses, a dust mask, and other necessary safety gear such as a long-sleeve shirt, work gloves, and durable shoes. These items will protect you from inhaling harmful dust and debris, as well as any sharp tile shards that may fly around during the removal process.

Prepare the Room for Tile Removal
These steps will help ensure your safety and prevent damage to your property.
First, clear the room of all furniture and appliances. This will give you plenty of space to work and avoid any potential hazards or damages. You don't want any obstacles that may get in your way when removing stubborn tiles.
Next, cover any vents and electrical outlets with plastic wraps to prevent dust and debris from getting into them. This is especially important if you are using power tools to remove the tiles. Covering these important features also prevents any damage to them that can be caused by the tile removal process.
Removing the Tile
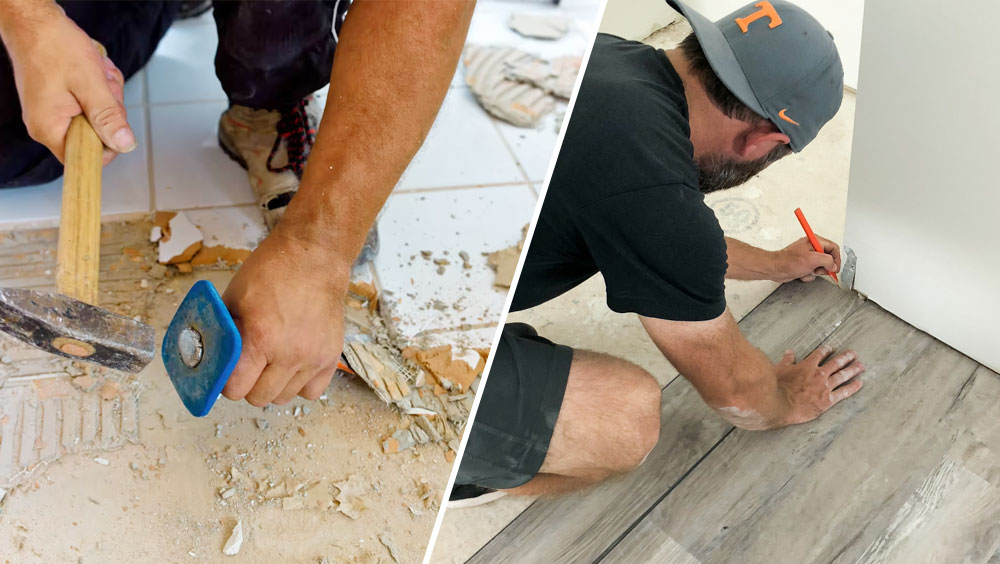
To start, you'll want to begin in a corner of the room where you can work your way outwards. Use a masonry chisel or cold chisel and hammer to chisel away at the tiles and grout. Work at a slight angle to avoid damaging the subfloor. If you encounter any stubborn tiles or pieces, use a rotary hammer at a 45-degree angle to loosen them.
Once you've removed all of the tiles, you may still have adhesive remaining. This can be especially stubborn, especially if you're removing old ceramic tile. To get rid of the adhesive, use a long-handled floor scraper, putty knife, or an angle grinder. For tough adhesive, you may need to use a power tool such as an electric tile stripper.
Removing the Underlayment
When removing tile flooring, it's important to pay attention to the underlayment. The underlayment is the layer of material between the tile and the subfloor, and it needs to be removed before installing new flooring. There are different types of underlayment, including plywood, cement board, and fiber cement board. Before beginning the removal process, it's important to identify the type of underlayment you have.
Cutting and prying up the underlayment can be a challenging task, especially if the underlayment is damaged. To remove the underlayment, start by scoring it with a utility knife. Make sure to score the underlayment deeply enough to cut through it but not so deeply that you damage the subfloor.
Once you've scored the underlayment, pry it up using a long-handled floor scraper or a flat shovel. If the underlayment is damaged, be extra careful not to damage the subfloor. Remove any remaining adhesive or thin-set mortar from the subfloor using a floor scraper or masonry chisel.
If the subfloor is severely damaged, you may need to replace it before installing new flooring. This can be a time-consuming and expensive process, but it's crucial to ensure your new flooring is properly installed and safe to use.
Cleaning Up
Cleaning up after removing the tile floor is as important as the actual removal process. Here are some steps to make sure the area is clean and ready for the next steps:
Removing debris and dust:
1. Collect all the tile fragments and pieces: Use a shop vac to collect broken tiles, bits of tile, and sharp tile shards from the floor. Carefully sweep the floor with a flat shovel to collect all the debris. Collect all the tile fragments, place them in a bag, and dispose of them properly.
2. Clean up the dust: The tile removal process generates a lot of dust. Use a dust mask and safety glasses to protect yourself. Use a shop vac and a soft-bristle brush attachment to clean up the dust completely. Vacuum the entire area of the floor and the walls where there may be dust that has collected.
3. Clean up the tools: After removing the tile, clean up all the tools used in the process. Use a soft cloth to wipe dust and debris off the tools to make sure they do not rust. This also helps to ensure that they remain in good condition and can be used again.
Installing New Flooring
Installing new flooring is an exciting project that can give any room a fresh new look. However, before you start, it's important to choose the right type of flooring for your space, prepare the subfloor correctly, and follow the right steps to install your new flooring.
Choosing the Right Flooring Material:
Choosing the right flooring material is crucial when planning a new flooring project. The material you choose should meet your style needs, lifestyle needs, and budget. Some popular flooring options include hardwood, carpeting, laminate, vinyl, and tile. Each has its own unique look, feel, and benefits.
Hardwood flooring is durable, long-lasting, and adds warmth and elegance to a room. Carpeting is comfortable, insulating, and great for rooms where you'd like extra coziness. Laminate flooring is available in a wide range of colors, textures, and styles, making it a great option if you want your floors to look like hardwood or tile. Vinyl flooring is affordable, water-resistant, and low maintenance. Tile flooring is available in a variety of materials like ceramic, porcelain, and stone, each with its own unique look.

Preparing the Subfloor:
Properly preparing the subfloor is crucial if you want your new flooring to last for years to come. First, remove any old flooring material and clean the subfloor. If the subfloor is uneven, you may need to use a self-leveling compound to create a smooth surface.
If you're installing your new floor over concrete, ensure that there is no moisture present, as this can cause the new floor to buckle or warp. You may need to install a moisture barrier to prevent this. Additionally, check the subfloor for any damage, as this will need to be repaired before proceeding.
Installing the New Flooring:
Once the subfloor is prepared and ready for your new flooring, it's time to get started. The process for installation may vary depending on the type of flooring you've chosen, but generally, you'll start by laying down a layer of underlayment.
If you're installing hardwood flooring, you'll lay the planks down and nail or staple them into place using a pneumatic flooring nailer or stapler. For carpeting, you'll need to stretch it, trim it, and secure it to the tack strips along the perimeter of the room.
Laminate flooring and vinyl flooring are both typically installed in a floating fashion, meaning they're not glued or nailed to the subfloor. Instead, they interlock with each other and are held in place by the weight of the flooring itself.
Tile flooring requires a bit more work, as it's typically laid out in a pattern and then mortared into place. You'll need to use spacers to ensure that all of your tiles are level and even. Once the mortar is dry, you can grout the tile for a finished look.
Frequently Asked Questions:
Can I remove the tile floor without damaging the subfloor?
Yes, you can remove the tile floor without damaging the subfloor. The best way to do this is to take your time and be careful when removing the tiles. Start by using a chisel to chip away at the grout, then use a hammer and chisel to gently loosen and pry up the tiles. Once they're loose, you can pull them up carefully with your hands or a pry bar.
How long does it take to remove tile floor?
Removing tile flooring can take anywhere from a few hours to a few days, depending on the size of the room and how many tiles are being removed.
Do I need special tools to remove tile floor?
You will need certain tools to remove tile flooring, such as a chisel, hammer, and pry bar. Depending on the type of flooring you have, you may also need a wet saw to cut the tiles into smaller pieces for easier removal. Additionally, it's a good idea to have safety glasses and gloves on hand to protect your eyes and hands from any debris that is created during the tile removal process.
How much does it cost to remove tile floor?
The cost of removing tile flooring can vary depending on the type and size of the room. Generally, you can expect to pay anywhere from a few hundred dollars up to several thousand. The larger the room and the more complex your tile layout is, the higher the cost will be. Additionally, you may need to hire a professional if you're uncomfortable with tackling such a project yourself.
Can I install new flooring over the existing underlayment?
Yes, you can install new flooring over the existing underlayment. However, it is important to make sure that the underlayment is in good condition and free of any damage or excessive wear and tear. Additionally, some types of flooring may require additional underlayment for optimal performance. It is also important to ensure that there are no moisture issues present before laying your new floor.


